Walkthru
How it works
"Aigon", the Walkthru agent is designed for professionals in the building industry who need to capture what you see on site. Everything is captured using WhatsApp, simply by sending text or voice notes, images or videos to Aigon's WhatsApp number.
During or after the session, a full report is generated in various formats depending on what you want to do with them. If you are already using Claude or ChatGPT you can also connect Aigon directly to your favorite LLM via MCP, and you can work on your notes directly, and in the moment you've taken them, without the need to generate a report first.
Quick start
- Sign up to Walkthru by clicking here and hitting SEND.
- Start a new session by typing /new
- Send text and voice notes, images, videos and documents for the report
- Create the interim report or the final report
- Work with your reports directly or using an LLM via JSON or via MCP
Sign up
Sign up is simple. You simply send the following WhatsApp message to Aigon on +44 7477 156095
You can do this automatically by clicking this link, or the button below.
Either route opens WhatsApp with the message already written — all you need to do is hit SEND to connect your WhatsApp account to Aigon.
Reporting session
A reporting session generates one report. You
- start a new session for each property visit,
- send notes to Aigon during the visit,
- generate interim reports whenever you want to see how it is shaping up, and
- generate the final report when the visit is done and the interim report is shaping up nicely.
Start a new session
You start a session by sending
where the session name must be at least six characters long and should be unique — adding a date is an easy way, eg /new newgate-2026-05-12.
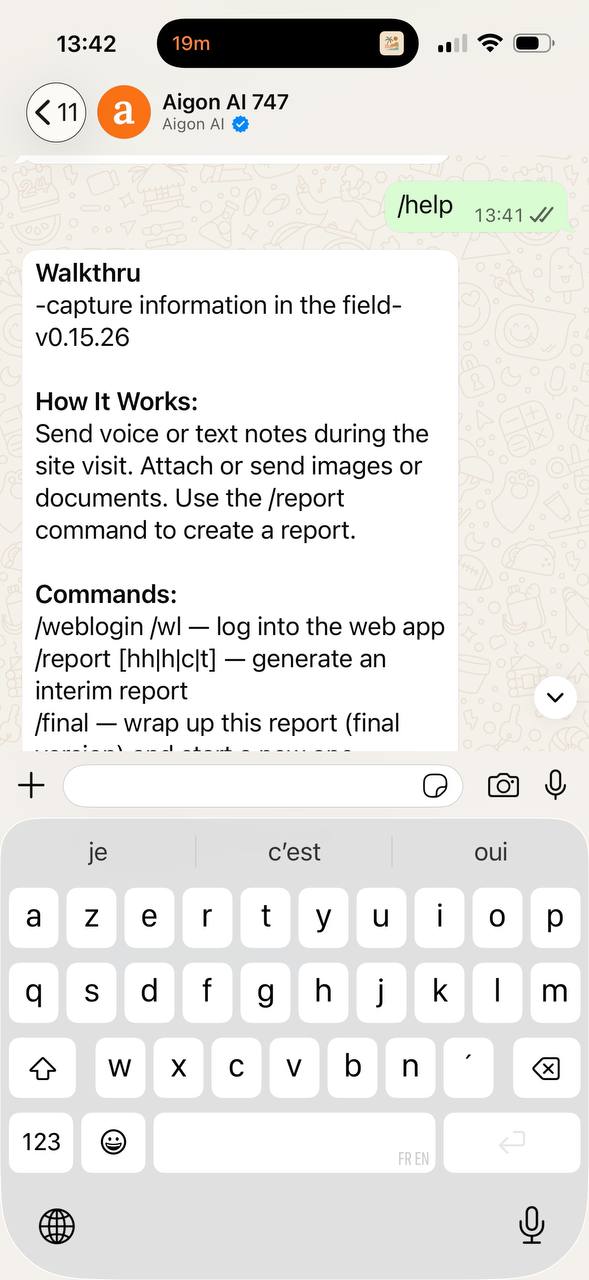
Here are screenshots from an example walkthru. First we use
/help
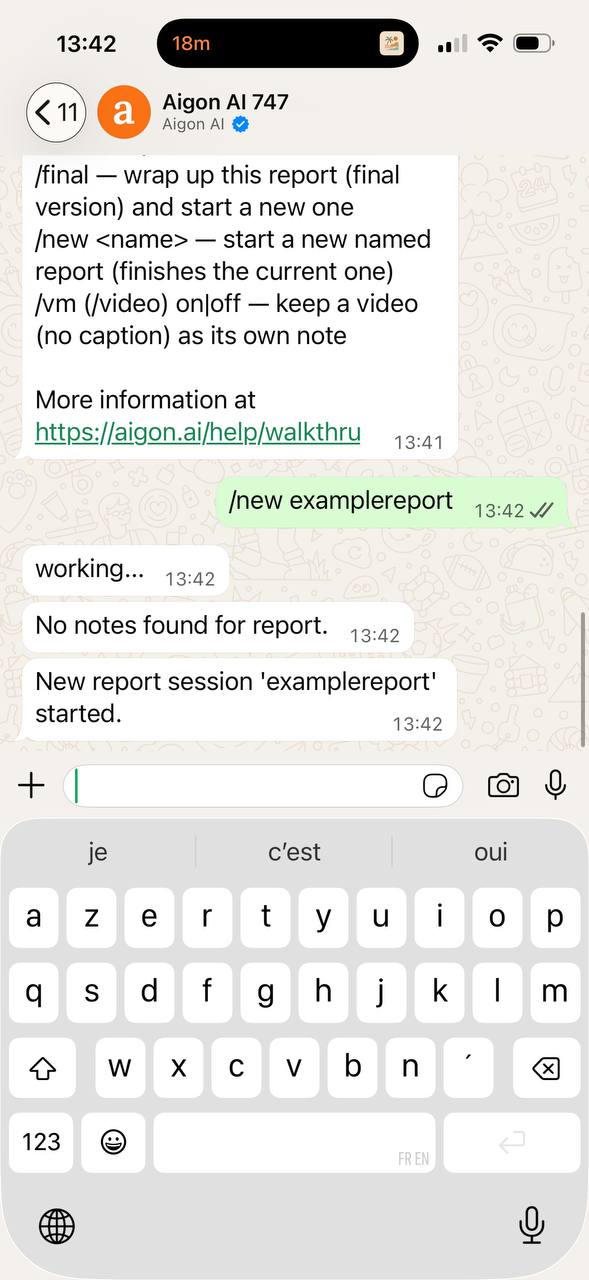
to remind us of the available commands. Then we use
/new examplereport
to start a new reporting session.
Take notes
Consider Aigon your colleague back at the office, and send them whatever you find notable during your visit.
- Text — if you want to type notes or use your own transcription service like Wispr Flow you can simply send text notes.
- Voice notes — are generally easier to send, and therefore richer in content; send the message in any language you want, and Aigon will transcribe it for you, clean it up, and translate it to English (or any language of your choice)
- Photos — attach them to a note you are sending or on your own; they are consolidated with the relevant note, described and the text found on them is transcribed and searchable
- Videos - you can attach them like photos to a message, or use video mode to make them their own message; in any case, video text is transcribed and searchable
- Documents - you can attach documents to a note, and Aigon will extract the text and make it searchable as well
The following pictures show the progress of the example report. First there was a voice note (outside the screenshot) that got transcribed to "So the following pictures are of the living room". Then there is another voice note visible that is transcribed to "So the cornices here...". Then there is a message with three images and one video and no caption, which is therefore consolidated into the cornices message. Moving on there is another voice message transcribed to "Also the white paint..." and again another no-caption message, this time holding five images. Those are consolidated with the paint message.
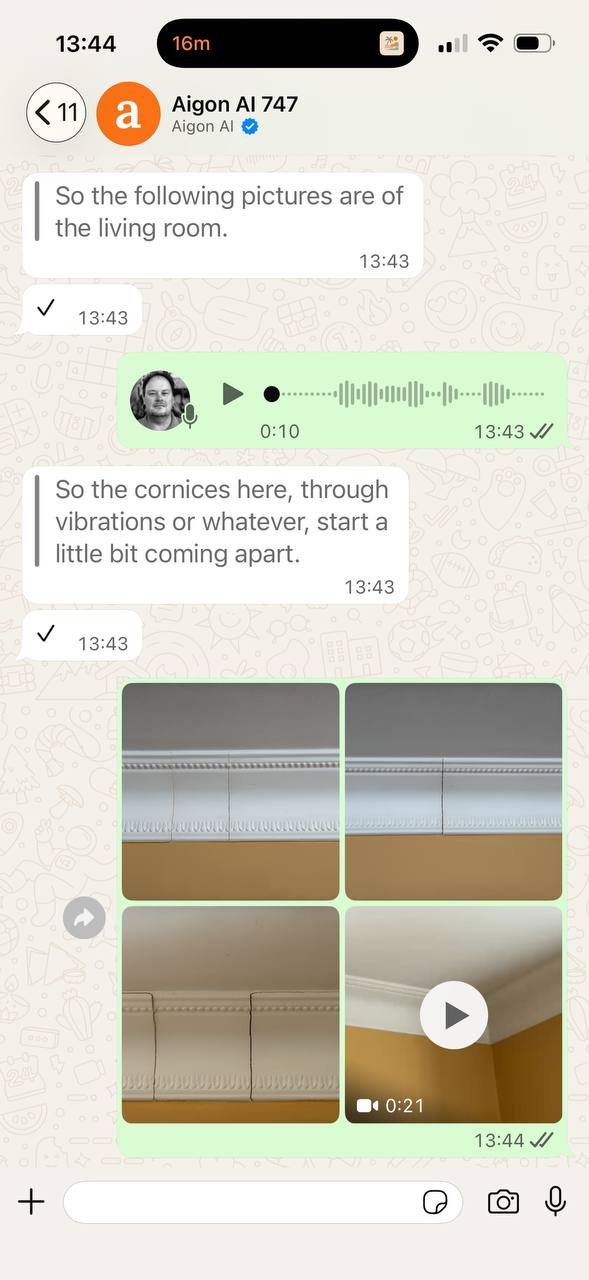
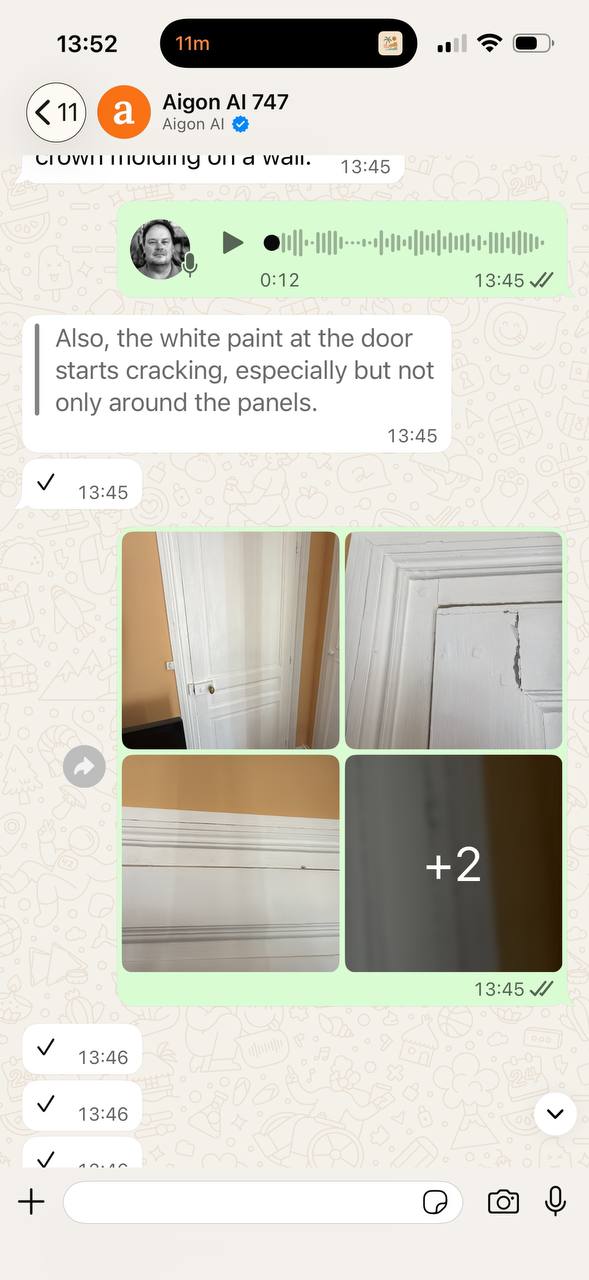
Image consolidation
By default, photos, videos and documents that are sent without a caption are attached to the previous note, provided this note is less than five minutes old. This is particularly useful when using voice messages because it is not possible to add attachments to a voice message.
If you prefer that they are attached to the following note instead, send
at any point. To go back to the default, send
and /cons alone shows the current setting.
Video mode
By default, videos are treated as attachments to the previous or next note, depending on the consolidation settings. In this case the note text is whatever was recorded for the note, and the text transcribed from the video (if any) is kept as a separate attachment.
Sometimes the following workflow is more convenient: 1. you send a video note, recording the big-picture situation together with voice commentary, and 2. attach photos of detailed features to that video note.
This is the video mode that you turn on with
In this mode, each video sent creates a new note, and the note text is the video transcript. Document and image consolidation works as usual, so with the default setting if you send a video with comments first and then detailed images they'll all end up in the same note, with the note text being the transcript of the video.
To go back to the default mode use
and /vm alone shows the current setting.
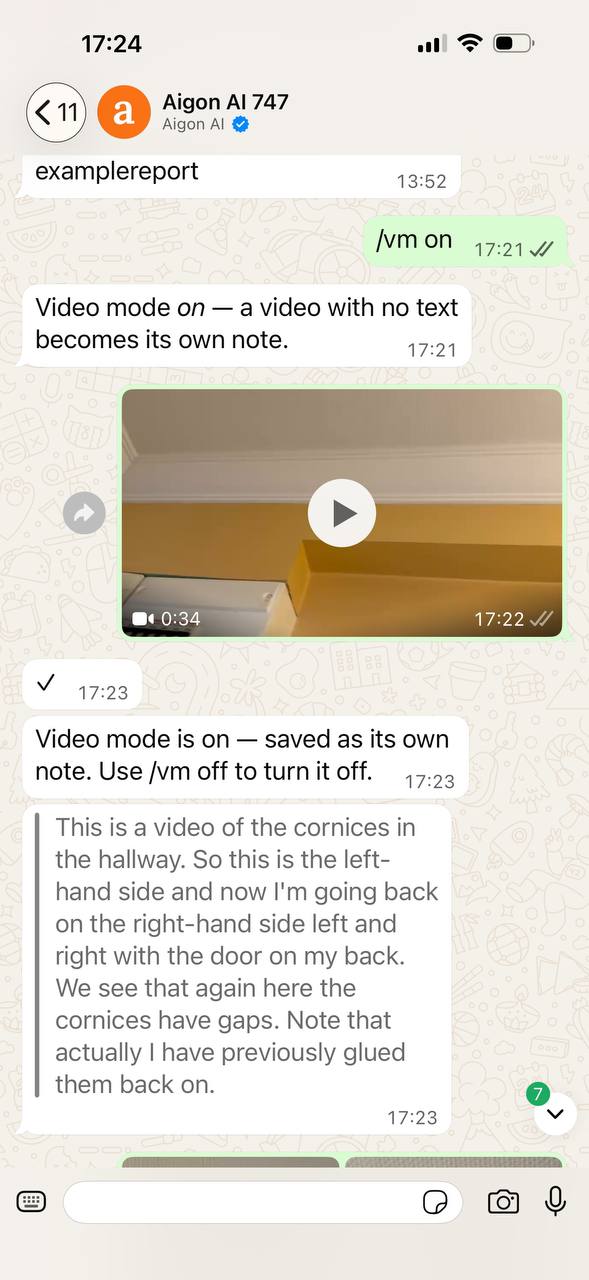
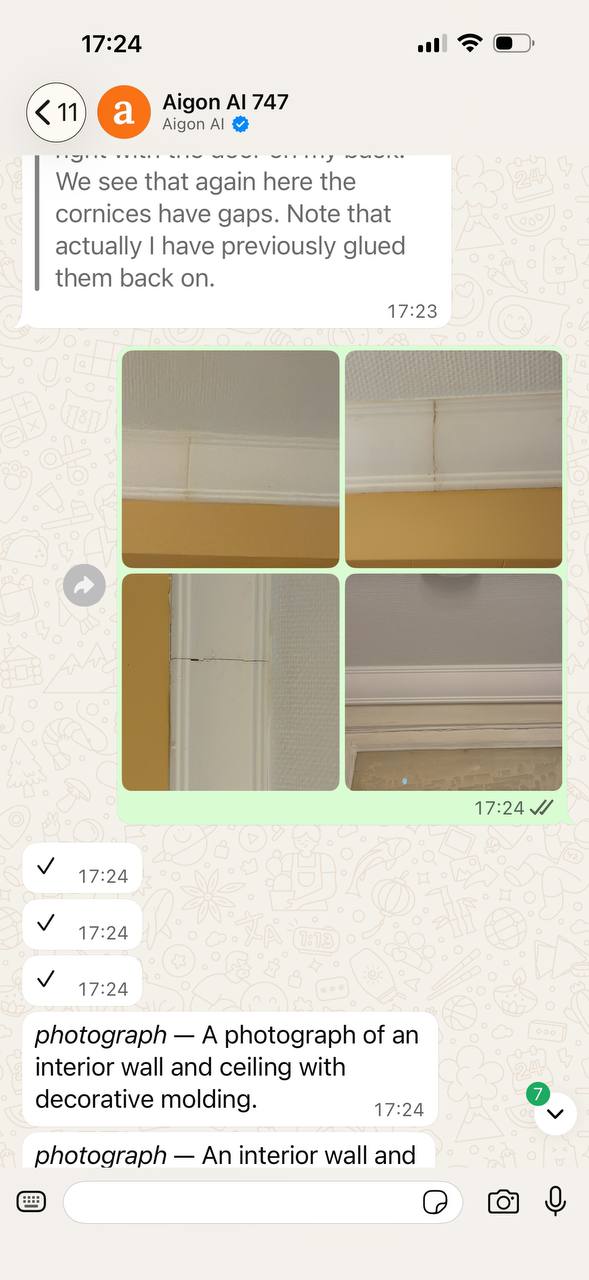
Here is an example. Video mode is switched on, then a video is recorded — and the transcript of what was said while filming becomes the note text. Photographs sent afterwards fold into that same note, exactly as they would under any other note, and each is described as it arrives.
Creating reports
Interim reports
Send
to create an interim report. The assistant cleans up the notes with an LLM, groups them into findings, and sends back three things: a link to the report in the web app, a public link for feeding to an LLM, and a PDF.
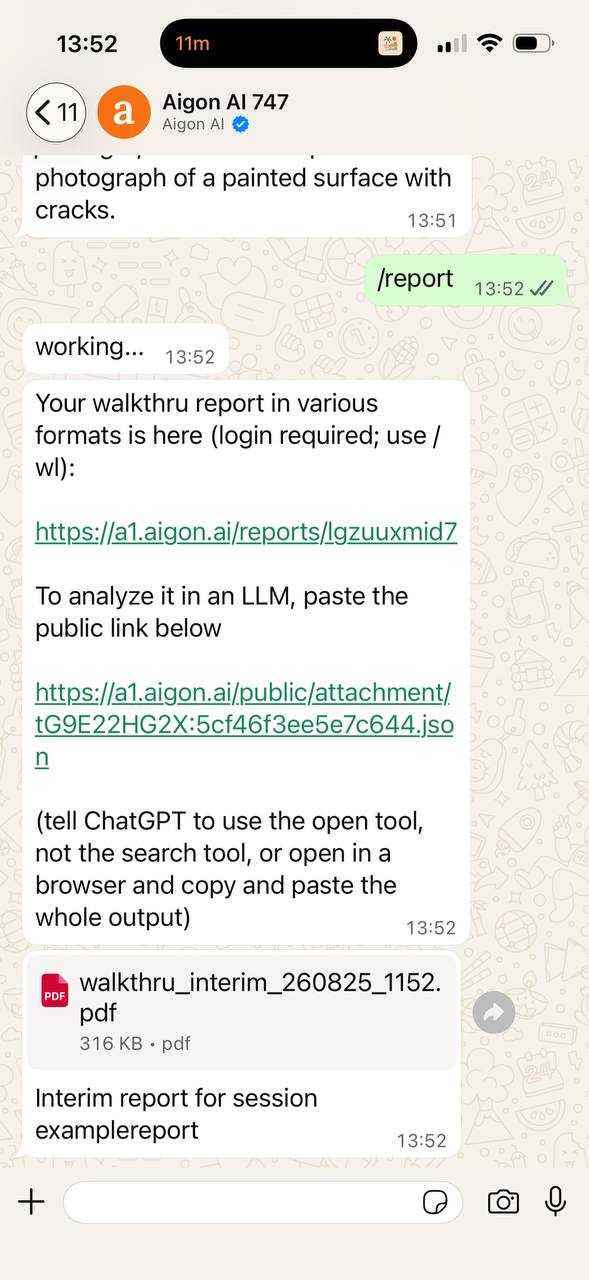
Interim reports are drafts. They expire after a few days, and you can regenerate one as often as you like — nothing is fixed until you close the session.
More notes or explanations
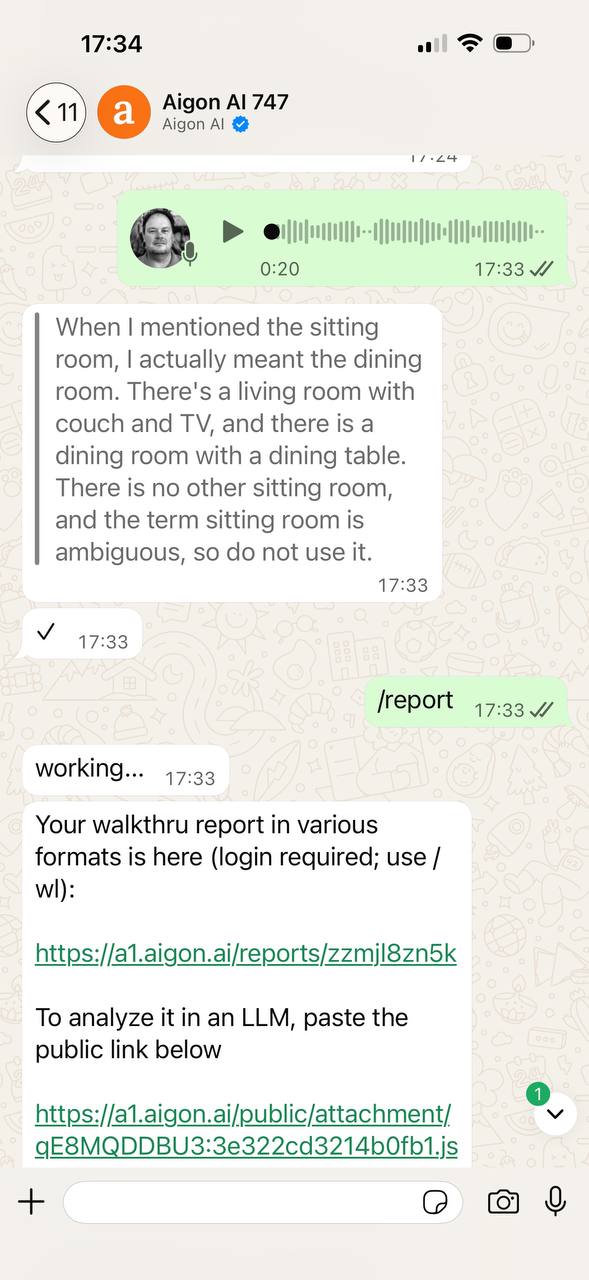
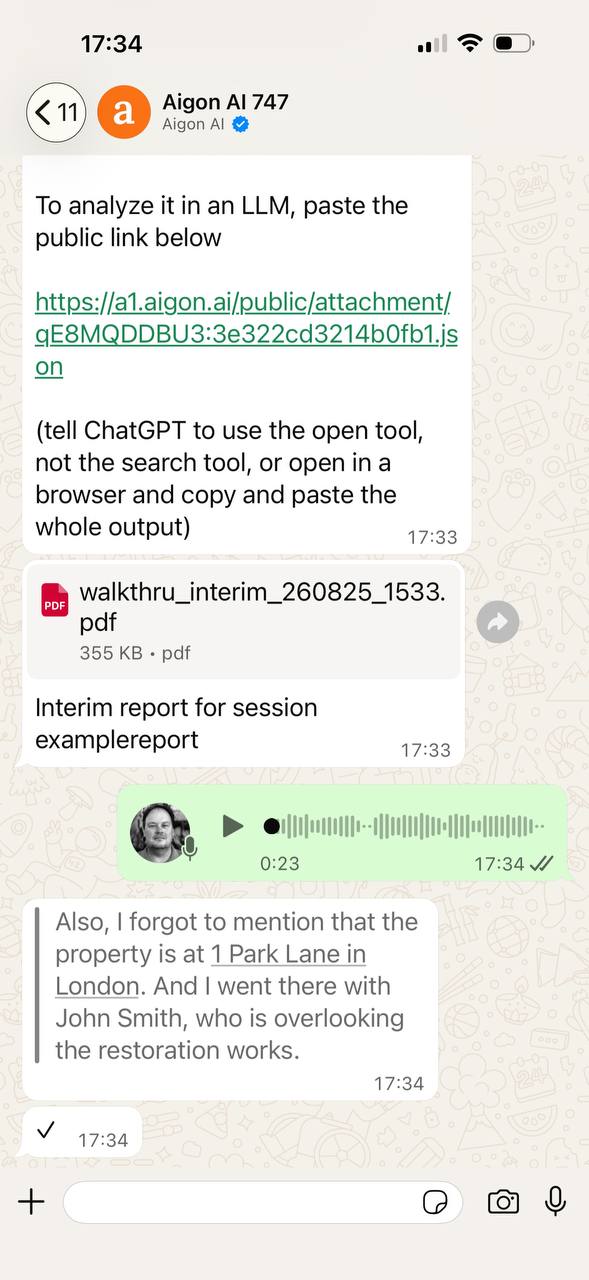
Reading the interim report may show that something is missing. You can carry on sending notes into the same session. Those notes can just be more of the same, or explanations like
When I mentioned the sitting room, I actually meant the dining room. There's a living room with couch and TV, and there is a dining room with a dining table. There is no other sitting room, and the term sitting room is ambiguous, so do not use it.
or
Also, I forgot to mention that the property is at 1 Park Lane in London. And I went there with John Smith, who is overlooking the restoration works.
Those corrections will be taken into account the next time you generate a report. See below how this looks in our example.
Final report
When the visit is done, send
to close the session. The yes is the
confirmation and is required — it is a reminder that this operation cannot be undone.
The final version is kept permanently in the web app rather than expiring, and a new empty session opens behind it.
Working with reports
Every report is produced in four formats at once. Use /wl for a login link to the web app, where all of them are listed.
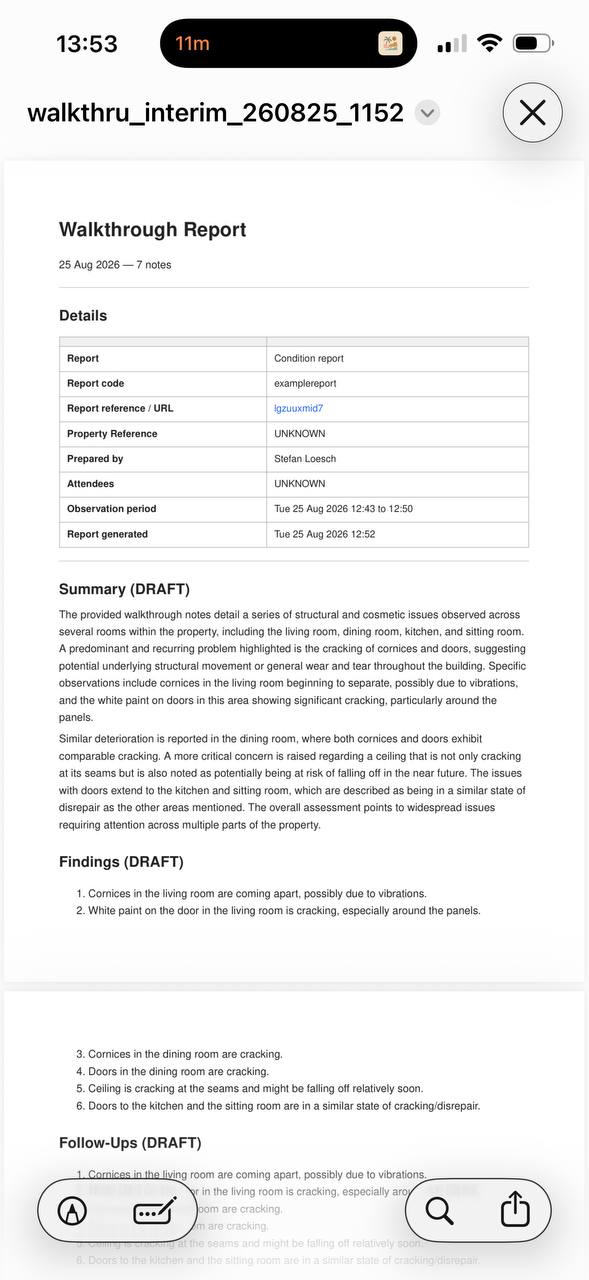
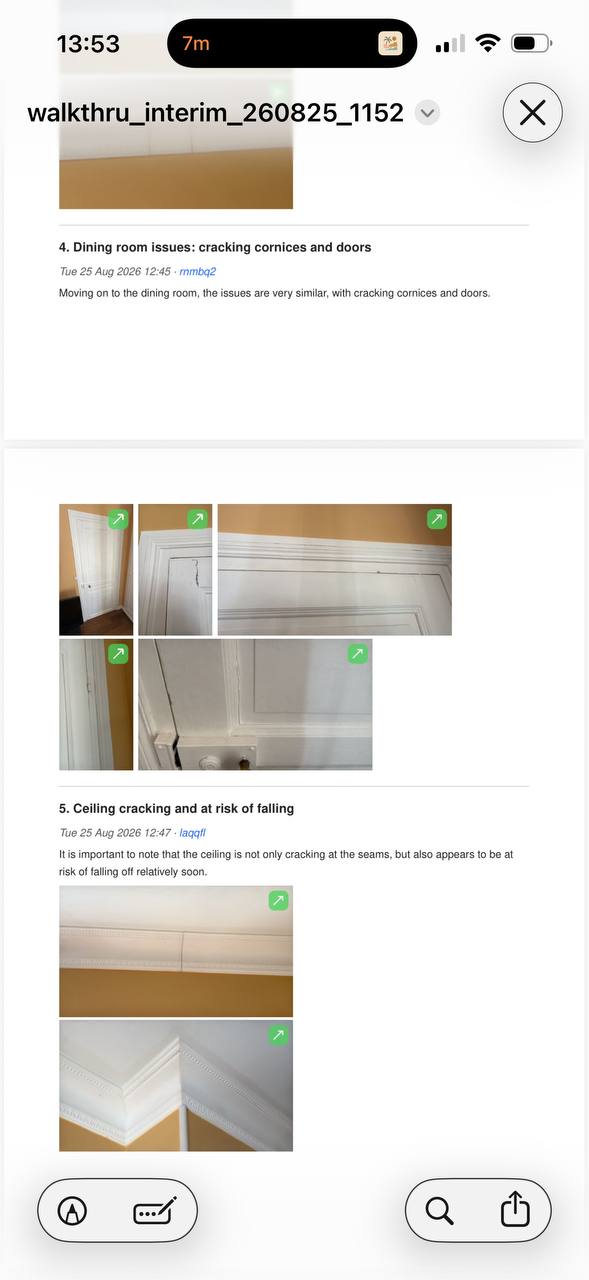
The read-and-send format: a title page with the details of the visit, an LLM-written summary, the findings as a numbered list, and then every note in order with its photographs.
Word
The same report as a .docx Word document, for when it is the starting point for you to review. The Word document can be created in your house style, using your own branding and templates.
LLM via JSON
All report data can be obtained using a private link to a JSON document that you can paste into your favorite LLM who can then generate the report. The LLM has access to all notes, and all the images, videos and documents uploaded. Best for when the report requires some post-processing that you do not want to do yourself.
Tell the model to open the link rather than search for it. If it will not, open the link in a browser and paste the contents in.
LLM via MCP
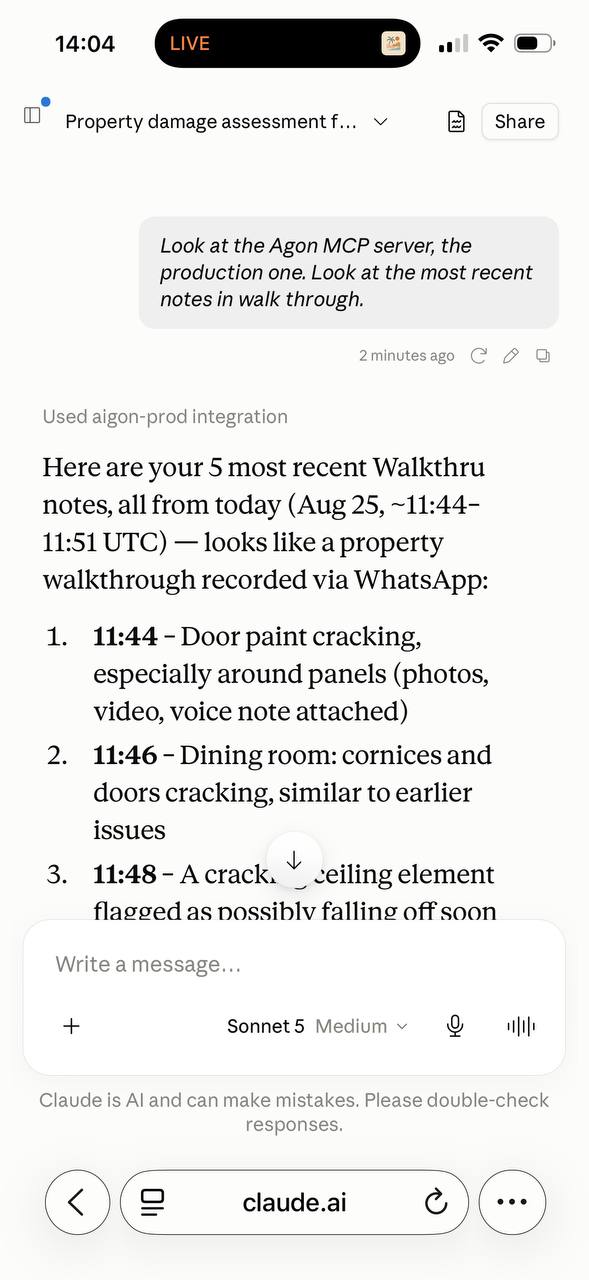
If your assistant speaks MCP, it can reach your notes directly — no links to paste, and no need to have generated a report first. It can pull the attachments too, so you can ask about a specific photograph rather than about the text alone.
Setting that up is covered in Connecting MCP servers: the three access points, logging in by link or QR code, bearer tokens for clients that cannot do OAuth, and step-by-step instructions for Claude and for ChatGPT.
Troubleshooting
Allow permissions in Claude
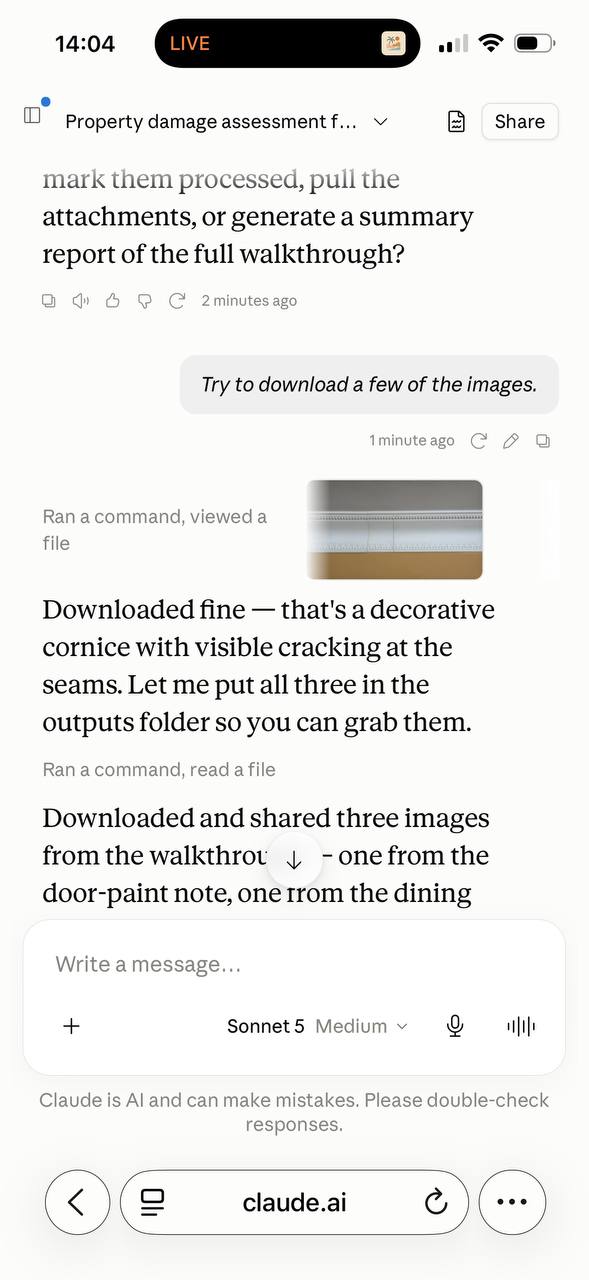
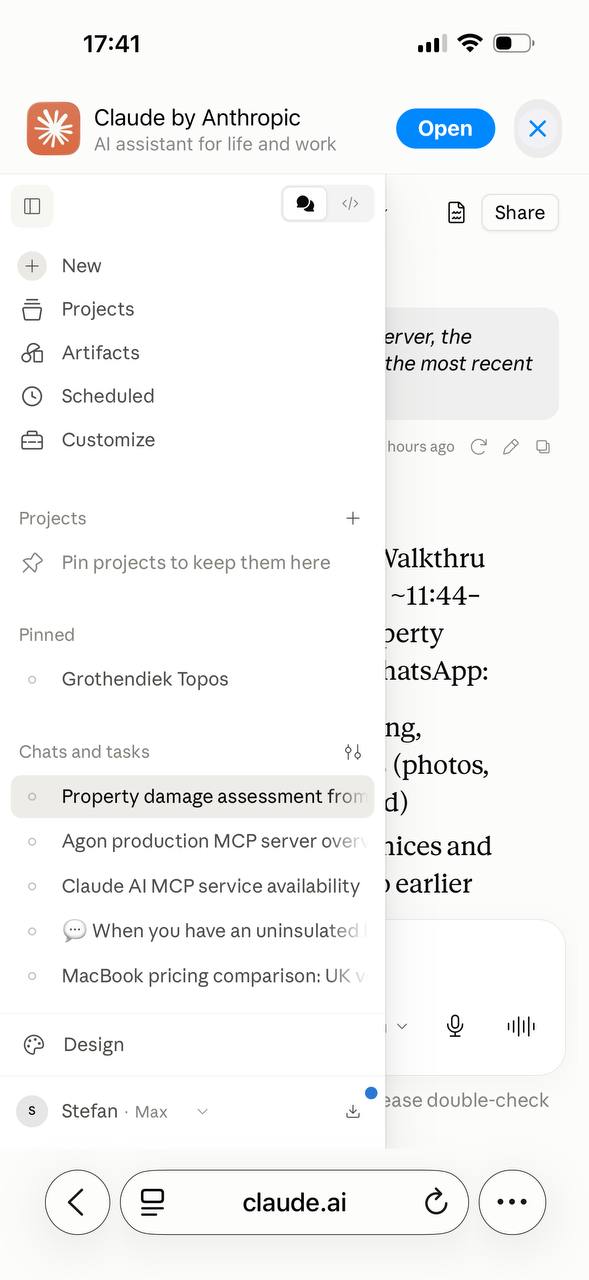
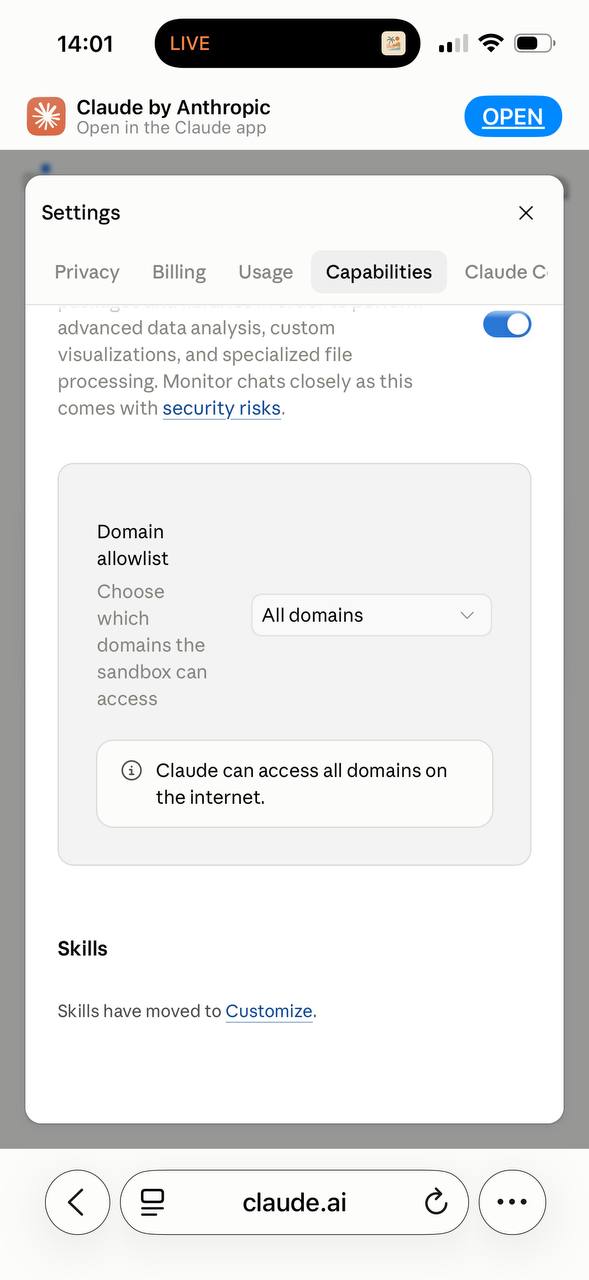
Claude may refuse to download from Aigon unless specifically allowed. If this is the case go to claude.ai and log into your account. Bring up the menu bar by touching the button located in the top left and then open the Customize menu. On the modal that appears choose the Capabilities tab and scroll down to Allow network egress. You can choose All domains, as in the screenshot below.
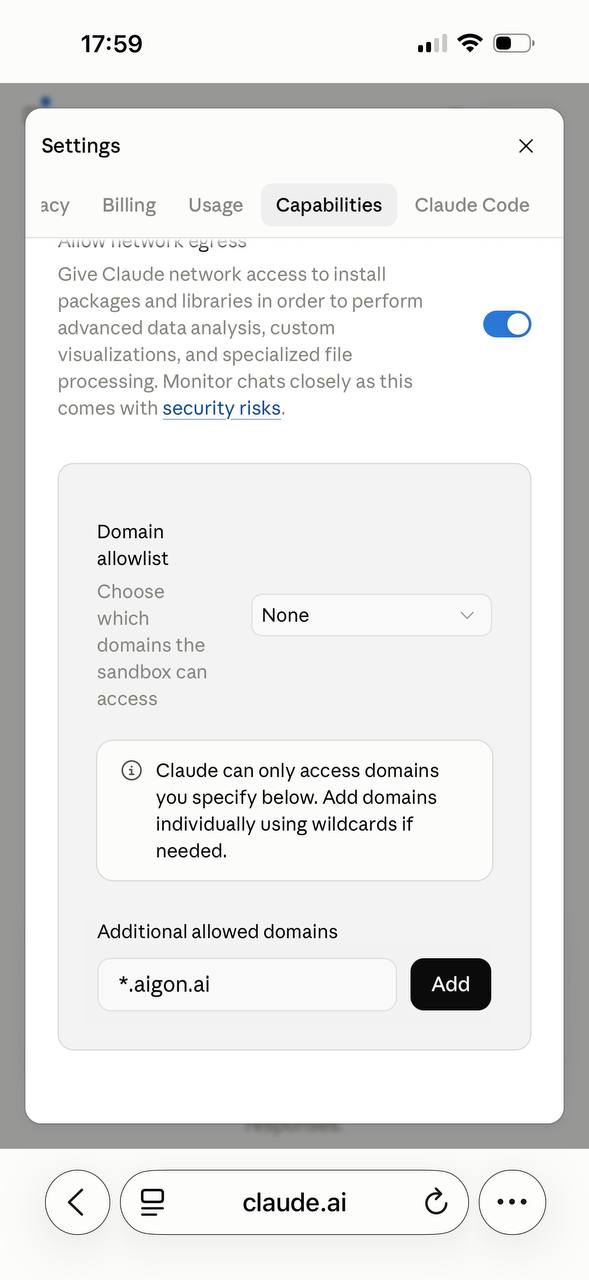
Alternatively you can choose None or Package managers only and then add Additional allowed domains. The main domain required for aigon is
*.aigon.ai
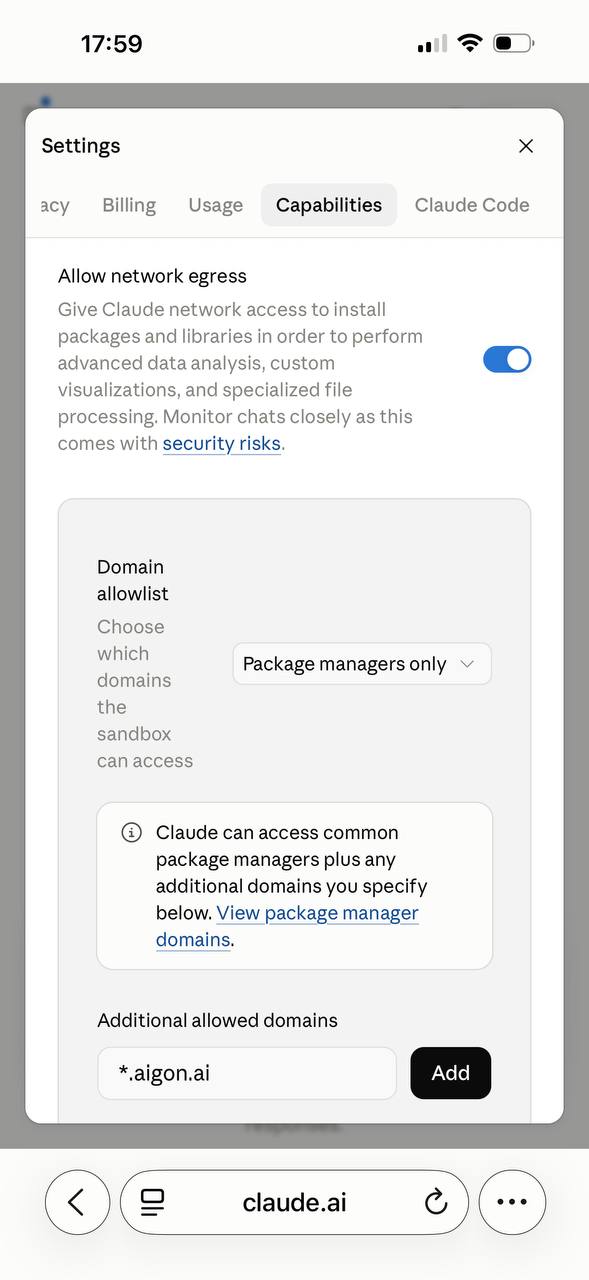
Note that those settings only take effect for new sessions.